Your Cart is Empty

People throw away tonnes of rubbish each day, and that isn't good for our planet. Luckily, there are lots of craft projects that can help us to reduce waste and have fun along the way! We asked Scott Hawthorne, who works at a waste and recycling bin company called SkipsAndBins.com, to share his five favourite ideas with us.

There are lots of unwanted items that you can turn into quirky plant pots for your garden or windowsill, such as old wellies, teacups or glass jars. You could even ask an adult to help you wash out a used tin can or cut the bottom off a plastic bottle.
You just need to make sure that the container is waterproof and has enough room for your plant to grow.
If you'll be growing outside, try growing bee-friendly plants like lavender to help our insect friends get the pollen they need. At my waste and recycling company, we think it's very important to save the bees, which is why we support Friends of the Earth and The Bee Cause.
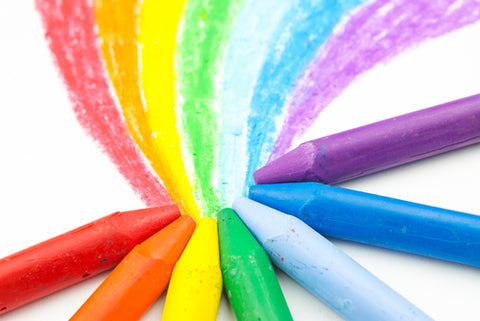
If you have small or broken wax crayons that aren't very easy to colour with anymore, it's better to recycle them than to throw them away. One of the easiest and most fun projects is to create new multicoloured crayons!

A memory box is a place where you can store special photographs and items. They are lots of fun to look at as you get older!
Of course, you could also use this technique to create any kind of personalised box, such as a jewellery box or toy box. Why not try theming your decorations to suit what will go inside?

Rather than buying a skittles game from the shop, you can create your own by recycling unwanted plastic bottles!
You could also recycle tins from baked beans, soups, and more to create a tin-can alley game! Just be careful because the edges on these can be sharp.

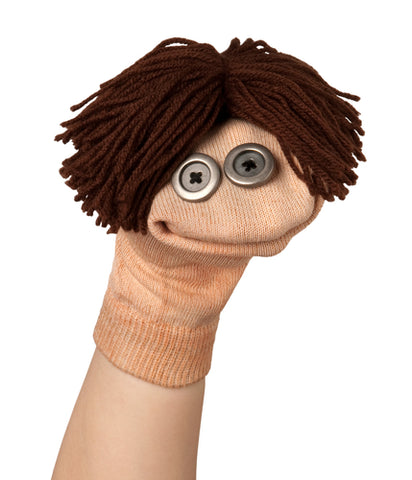
If there are any odd or holey socks lying around your house, you can create all sorts of sock puppets by sticking, drawing, or sewing on decorations. It can be as simple as adding two old buttons for eyes and some wool scraps for hair!
Another fun idea is to create a sock bunny:
Always remember to get an adult's permission before using any materials and ask for their help with tricky or dangerous tasks, like cutting.
Don't forget that you can find lots of other craft ideas on ourblog and in themagazine!

Brrrr! It’s getting chilly outside! But that’s no reason to stop exploring the beautiful outdoors and brave wildlife that is still busy over winter. By collecting natural objects like berries, mistletoe and leaves, you can create some remarkable pieces of art! The colder the better – because yo...

What happens to water when it freezes? Why do big icebergs float on water? We’ll answer these questions with a simple (and very cold) experiment! Brrrr.. STEP 1 WHAT TO DO Fill the plastic cup with tap water, then mark the level of the water with the marker. Gently put the cup in the freezer – be ...

Have some messy fun creating silly faces using mud and different things you find in nature!


